Saturday, December 31, 2011

Netduino "Robot"

Over the past month or so my son and I built a "Robot" with our Netduino.


Parts:

Physical Assembly:

First, we mounted the 8 pin headers upside down in the motor driver breakout like this:


We did this so that we could easily mount this into the breadboard and see the pin descriptions.  We didn't insert it all of the way into the breadboard - rumor has it that these get hot - although ours does not seem to.

Next, we assembled the robot chassis.  Some of the parts have tight tolerances, but everything fit together fine.

We attached the battery holders to the lower platform and the Netduino and breadboard onto the top platform.  Then we mounted the IR sensor to the "front" (the end with the 2 wheels).

Do NOT mount the IR sensor like it is in the picture above.  Our first day we managed to drive it under a kitchen cabinet and it cracked the circuit board of the IR sensor.  :(  When our replacement arrives, I think we will mount it on the lower deck so it is safer.

Wiring:

We wired it like this:

IR sensor yellow wire to the Netduino AIN0
IR sensor black to ground on Netduino
IR sensor red to Netduino 5V

9 volt power to Netduino
6 volt power black to ground on Netduino (via the RadioShack connector and some hookup wire)
6 volt power red to motor driver VM (same as above)

Netduino to TB6612FNG breakout
DIO0 = Standby (This needs to be high (true))
DIO1 = AIN1
DIO2 = AIN2
DIO5 = PWMA
DIO6 = PWMB
DIO8 = BIN1
DIO9 = BIN2
Ground to ground

TB6612FNG breakout to motors
AO1 = Red motor lead (Right)
AO2 = Black motor lead (Right)
BO2 = Black motor lead (Left)
BO1 = Red motor lead (Left)

Code:

Now it was time to code a little bit.  As usual, the path was paved by the great authors in the communities at Netduino.com (http://forums.netduino.com/index.php?/forum/4-netduino/).

We used the library provided from this post: http://forums.netduino.com/index.php?/topic/493-netduino-tankbot/page__view__findpost__p__3665 from user ajcg1973.


using System;
using System.Threading;
using Microsoft.SPOT;
using Microsoft.SPOT.Hardware;
using SecretLabs.NETMF.Hardware;
using SecretLabs.NETMF.Hardware.Netduino;
// make sure you include the library - ours was (messily) inline

namespace IRRobot
{
    public class Program
    {
        static AnalogInput analogInput = new AnalogInput(Pins.GPIO_PIN_A0);
        public static void Main()
        {

            OutputPort stby = new OutputPort(Pins.GPIO_PIN_D0, true);
            AjbMotorTB6612FNG motors = new AjbMotorTB6612FNG(Pins.GPIO_PIN_D5, Pins.GPIO_PIN_D1, Pins.GPIO_PIN_D2, Pins.GPIO_PIN_D6, Pins.GPIO_PIN_D8, Pins.GPIO_PIN_D9);
            motors.Motor1Direction = AjbMotorTB6612FNG.MotorDirection.Forward;
            motors.Motor1Speed = 50;  // Set the motor to 50% speed
            motors.Motor2Direction = AjbMotorTB6612FNG.MotorDirection.Forward;
            motors.Motor2Speed = 50;  // Set the motor to 50% speed
            while (true)
            {
                Thread.Sleep(250); // pause to gather analog sample
                int analogValue = 1024 - analogInput.Read();
                Debug.Print(analogValue.ToString());
                if (analogValue < 550)
                {
                    motors.Motor1Direction = AjbMotorTB6612FNG.MotorDirection.Reverse;
                    motors.Motor1Speed = 30;  // Set the motor to 30% speed
                    motors.Motor2Direction = AjbMotorTB6612FNG.MotorDirection.Forward;
                    motors.Motor2Speed = 30;  // Set the motor to 30% speed
                    Thread.Sleep(1000);
                    motors.Motor1Direction = AjbMotorTB6612FNG.MotorDirection.Forward;
                    motors.Motor1Speed = 50;  // Set the motor to 50% speed
                    motors.Motor2Direction = AjbMotorTB6612FNG.MotorDirection.Forward;
                    motors.Motor2Speed = 50;  // Set the motor to 50% speed
                }

            }

        }

    }
}

This still needs some tweaking.  Or a whole re-write.  :)  But it shows how to drive the motors using ajcg1973's library and how to read the IR sensor.  We flipped forward and reverse in the library - this might mean we are driving backwards.  :)

You might want to watch the IR output values for a bit to get a feel for what it can see - ours is a bit far sighted so it runs into things some times. :) 

Conclusion:

This was a fun project.  The kids loved the little robot as it scooted across the floor avoiding obstacles.  We'll probably enhance our software and try some different sensors over the next few weeks.

We hope that you enjoyed this post.

References:

Original library code: http://forums.netduino.com/index.php?/topic/493-netduino-tankbot/page__view__findpost__p__3665
We got wiring help from this thread at the Netduino forum: http://forums.netduino.com/index.php?/topic/2396-control-dc-motor-with-dual-motor-driver/

Wednesday, November 30, 2011

A Netduino Keyboard Simulator

I realized that I haven't posted anything here in awhile...  So, to remedy this, here's my post on a Netduino keyboard simulator.

What this project does is to turn your Netduino into a "Human Interface Device" or HID.  I originally got the idea for this when I needed a fun project for a Halloween blog post at work.  A friend had sent me a link to a similar (but much more focused and useful) project: http://www.irongeek.com/i.php?page=security/programmable-hid-usb-keystroke-dongle

So, in their footsteps, and with some help from a library from the Netduino forums, we built a generic "virtual keyboard."

So, yeah - like hardware based macro keys I guess. :)


Gathering the Parts:


I use SparkFun (and they are great) - but you can probably get all of these parts from a variety of vendors.

Development Environment:

If you don't already have your Netduino dev environment setup, you can go here: http://netduino.com/downloads/ and follow the "getting started" guide to setup your development environment.

Netduino Serial Hardware Setup:

First, connect the ground of the FTDI to the Netduino ground.
Next, hook the FTDI rx pin to the Netduino dio1.
Finally hook the FTDI tx pin to Netduino dio0.

You will also want to hook up an external power source.

Connect a USB to the FTDI.

Connect a USB to the Netduino.

Netduino Serial Setup Software:

(Check your firmware version with MFDeploy - mine didn't need re-flashed.)

Once you get your parts, and your dev environment is all setup - you will need to switch your Netduino to use serial programming (because the debug info is sent over that channel and it will interfere with the USB stuff you are trying to do).

Follow these instructions to do this: http://forums.netduino.com/index.php?showtopic=945

Here's a video from Omar on the Netduino Forum that covers this too:


http://www.youtube.com/user/VCSandARM#p/u/4/-yNC1nU1Nv4

Our Program:

Once you have this setup and tested, you'll want to move on to write your program.  You'll want to download keyboard.cs from this thread (use the last one on the page): http://forums.netduino.com/index.php?/topic/2274-netduino-usb-hid-keyboard-updated-code/

Then create a new "solution" in Visual Studio, target it to your serial interfaced Netduino and add the keyboard.cs to the solution (instructions from Omar in the link above).

Finally, we add our little bit of code for this:
using System;
using System.Threading;
using Microsoft.SPOT;
using Microsoft.SPOT.Hardware;
using SecretLabs.NETMF.Hardware;
using SecretLabs.NETMF.Hardware.Netduino;
using System.IO.Ports;
using Netduino_USB_HID_Library;

namespace Netduino_Touch_Keyboard
{
    public class Program
    {
        public static void Main()
        {

            string setupResult = Keyboard.SetUp();

            Debug.Print(setupResult);

            if (setupResult != "Success")
                return;

            OutputPort led = new OutputPort(Pins.ONBOARD_LED, false);
            led.Write(true);
            Thread.Sleep(1000);
            led.Write(false);
            Thread.Sleep(1000);
            // setup our interrupt port (on-board button)
            // InterruptEdgeLow = Interrupt on button press only (not button up)
            InterruptPort button = new InterruptPort(Pins.ONBOARD_SW1, false, Port.ResistorMode.Disabled, Port.InterruptMode.InterruptEdgeLow);

            // assign our interrupt handler
            button.OnInterrupt += new NativeEventHandler(button_OnInterrupt);

            // go to sleep until the interrupt wakes us (saves power)
            Thread.Sleep(Timeout.Infinite);

        }

        // the interrupt handler
        static void button_OnInterrupt(uint data1, uint data2, DateTime time)
        {
            Keyboard.HoldDown(Keyboard.Modifiers.LeftGUI);
            Keyboard.SendChar('r');
            Keyboard.AllUp();
            Keyboard.SendString("notepad.exe");
            Thread.Sleep(2000);
            Keyboard.SendString("\n");
            Thread.Sleep(2000);
            Keyboard.SendString("Hello World!");
        }
    }
}

Compile and deploy this to the Netduino.

Then unplug (if it was already plugged into the USB) and re-plug the USB to the Netduino. This is needed because the app takes a bit to start the first time and the USB driver will fail if you plug it in too quickly - this isn't a problem in "production" since it will be externally powered and running already.

Now press the on-board button.

It should, open up a copy of notepad.exe then write "Hello World!" into it.

References:
Netduino USB HID Code and Example:
http://forums.netduino.com/index.php?/topic/2274-netduino-usb-hid-keyboard-updated-code/
Official thread on beta HID support:
http://forums.netduino.com/index.php?/topic/1514-driverless-pc-netduino-communication-using-usb/
Keyboard class from here:
http://forums.netduino.com/index.php?/topic/2372-netduino-usb-hid-touch-screen-keyboard/

Tuesday, July 12, 2011

How to annoy your wife with a Netduino...

So, I stopped by a Radio Shack tonight to pick up some parts and decided to buy the Netduino some toys.

Amongst some other pieces, I picked up a 12 VDC Piezoelectric Buzzer (RS# 273-0059).  You can find cheaper ones online - just make sure that the low-end of the voltage range for yours is around 3 volts (http://www.netduino.com/netduino/specs.htm).

You can drive this pretty easily by simply plugging this buzzer in between the ground pin (GND) and one of the digital I/O ports (I used 13 - it's right next to the ground pin).  Somewhat annoyingly, it will immediately begin buzzing when you power-up the Netduino - this does not endear you to your sleeping wife.  :)

The plan was to make the last project into something useful.  As you may know - the FCC requires that amatuer radio operators identify periodically during operation (Sec 97.119 - http://www.w5yi.org/page.php?id=124).  With a couple quick modifications - you can make your Netduino provide your ID whenever you press the button.  This might actually be useful. I don't operate on CW often, but you can ID with CW wherever CW is authorized - So, everywhere but 60 meter right (not an issue for me)?

You can do this with a couple tiny modifications from the previous project:

First, change your OutputPort from:
// setup our output port (on-board LED)
static OutputPort led = new OutputPort(Pins.ONBOARD_LED, false);

to

// setup our output port (piezo buzzer (RS # 273-0059) between D13 and ground)
static OutputPort piezo = new OutputPort(Pins.GPIO_PIN_D13, false);

Then change your write operations from:
led.Write(true|false);

to
piezo.Write(true|false);

Then switch the MESSAGE constant to your call sign.   Hit the "Start debug" button and then press your button and you should get your call sign in CW over the buzzer at about 14 wpm (based on the UNIT constant being left at 100).

(I also ran across this free eBook on the .NET Micro Framework tonight - I haven't read through it yet - but it looks interesting - check it out:  Beginner's Guide to C# and .NET Micro Framework)

Sunday, July 10, 2011

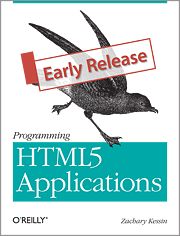
Review: "Programming HTML5 Applications" by Zachary Kessin; O'Reilly Media

I recently joined the O'Reilly Blogger Review program and the first book I selected to review was "Programming HTML5 Applications" by Zachary Kessin.

I enjoyed this book and learned a few interesting things along the way.  But I would tend to describe myself more as a JavaScript intermediate "user" more than a skilled JavaScript "programmer".  If you are an intermediate JavaScript user - this book will help you rise to the next level.  If you are already a skilled JavaScript programmer, I think you may find that there is not sufficient topical (HTML5) information in this book to justify your purchase.

Zachary Kessin has been involved with web development since the early 90's.  His experience as a working programmer shows clearly as he shares the lessons born from these experiences - this book doesn't read like a man page for JavaScript.  It reads like a talk from an experienced programmer sharing the tips of the trade - not only in terms of how - but also why you do things.  Overall this is good - but sometimes it seems like he slips into a shorthand way of describing things that takes a couple readings to decipher.

At 132 pages cover to cover, this is a short book, which isn't necessarily a bad thing.  You could probably make it shorter by skipping chapter one and ten - which really don't add much value to the experience in my opinion.  Chapter one is kind of a rehash of the history of the web with some focus on the evolution of development paradigms. In chapter ten, Zachary tries to look into his crystal ball and see the Internet of 2017.  Neither chapter is particularly relevant to the topic of programming HTML5 applications.  If you are already a skilled JavaScript programmer, you can probably similarly skip past chapters two through five without missing anything about HTML5 (although I found these chapters very useful - as they helped fill several gaps in my knowledge of JavaScript).

A better title for this book might be, "Modern JavaScript and HTML5."  Beginning in chapter two, the author takes the reader on a tour of "advanced" (my word) JavaScript methods, JQuery and ExtJS before discussing tools and methods for testing JavaScript.  I was aware of many of these topics at various levels previously, but the author does a good job of explaining them at a high level and why you would use them.  These chapters aren't really tutorials, but you get enough information to start exploring each area - which is probably how most of us learn JavaScript anyway.

From chapter six the book turns to HTML5 coverage beginning with a discussion about the LocalStorage APIs.  It goes on to offline applications, web workers and web sockets. It starts off as mostly similar content to what you would see in http://diveintohtml5.org/ or similar sites, but where it shines is that the author ties these features to real-world examples and back to the topics he previously discussed (like ExtJS and JQuery).  Throughout most of the book, the examples reinforce the text pretty well, although they could be commented better in several cases.

I think the main problem I have with this book is what I mentioned earlier - the title of the book doesn't seem to mesh with the content as well as you might hope.  For a book titled "Programming HTML5 Applications", my expectations were totally different than the (pretty good) content that was in this book.  I think I expected that the book might take that familiar path of developing a non-trivial "HTML5 Application" teaching how to use the HTML5 APIs as it goes.  I would have liked that better.

So...  Would I recommend this book?  Probably not.  It was interesting.  I learned a few things (much from chapters two and three).  It was a good start.  I wouldn't mind looking at it again when it is finished - I might change my mind (a great effort on finishing chapters eight and nine would be a good start).  But the problem right now is that there is already so much of the sort of HTML5 information that this book provides - in a very similar format ("this is what is new - here's a snippit") - available for free at a number of great HTML5 sites (like "Dive into HTML5" as mentioned before.)

Note: This was my first "Early Release" book I've looked at.  Apparently, "Early Release" indicates that the book was released directly from the author without the benefit of a review by an editor.  I found the large number of typos, misspellings, unfinished sections, etc. in the text to be quite distracting. I've tried to look past this.  I think that early access is a great idea especially for fast moving domains like web development.  But if this sort of thing bugs you - you might want to wait for the normal release.

Disclosure: I was provided with a free PDF copy of this book by O'Reilly as a part of their "Blogger Review Program" program.  (http://www.oreillynet.com/oreilly/bloggers/home.csp)

Saturday, July 9, 2011

My First Netduino App

So, as I mentioned earlier, we ordered a Netduino awhile back.  (We got ours via Amazon.)  This arrived earlier this week and I finally got some time to play with it during lunch today.

We had played with the MSP430 a little bit and messed around with an Arduino previously.  The Netduino is quite similar to the Arduino - but easier.  The combination of the Visual Studio, the .NET micro framework and the Netduino SDK (All linked to here) really works well so far.

After completing the obligatory "blink the LED" tutorial and reading the event handler example from the Netduino site I decided that a "Hello World" app was needed.  Obviously, this had to be in Morse code.  :)

So I whipped one up pretty quickly (this dev environment makes it REALLY fast - maybe 20 mins tops - mostly finding the proper timing for a dit and a dah (http://en.wikipedia.org/wiki/Morse_code)).  After work, I decided to clean it up a bit (it was a hideous sequential list of calls to dit and dah functions and sleeps).  At this time I ran across this implementation: http://www.hanselman.com/blog/TheNETMicroFrameworkHardwareForSoftwarePeople.aspx which seemed a lot more like what I was looking for.

So, mixing it all up - this is what I came up with. (Some portions © Copyright 2011, Scott Hanselman under Creative Commons Licensing http://creativecommons.org/licenses/by-nc-sa/3.0/)


using System;
using System;
using System.Threading;
using Microsoft.SPOT;
using Microsoft.SPOT.Hardware;
using SecretLabs.NETMF.Hardware;
using SecretLabs.NETMF.Hardware.Netduino;

namespace NetduinoApplication1
{
    public class Program
    {
        const String MESSAGE = "Hello World";
        const int UNIT = 100;            // controls speed
        const int SHORTMARK = 1 * UNIT;  // dit
        const int LONGMARK = 3 * UNIT;   // dah
        const int IEGAP = 1 * UNIT;      // gap between elements (dit and dah)
        const int SHORTGAP = 3 * UNIT;   // gap between chars
        const int LONGGAP = 7 * UNIT;    // gap between words
        
        // setup our output port (on-board LED)
        static OutputPort led = new OutputPort(Pins.ONBOARD_LED, false);

        private static Char[] Letters = new Char[] 
        {
                'a', 'b', 'c', 'd', 'e',
                'f', 'g','h','i', 'j', 
                'k', 'l', 'm', 'n', 'o', 
                'p','q', 'r', 's', 't', 
                'u','v', 'w', 'x','y',
                'z','0', '1', '2', '3', 
                '4', '5', '6', '7', '8',
                '9', ' '
        };

        private static String[] MorseCode = new String[] 
        {
                ".-", "-...", "-.-.","-..", ".", 
                "..-.", "--.", "....","..", ".---", 
                "-.-", ".-..","--", "-.", "---", 
                ".--.","--.-", ".-.", "...", "-", 
                "..-","...-", ".--", "-..-","-.--", 
                "--..","-----", ".----", "..---","...--", 
                "....-", ".....", "-....", "--...", "---..", 
                "----.", " "
        };

        public static void Main()
        {
         
            // setup our interrupt port (on-board button)
            // InterruptEdgeLow = Interrupt on button press only (not button up)
            InterruptPort button = new InterruptPort(Pins.ONBOARD_SW1, false, Port.ResistorMode.Disabled, Port.InterruptMode.InterruptEdgeLow);

            // assign our interrupt handler
            button.OnInterrupt += new NativeEventHandler(button_OnInterrupt);
            
            // go to sleep until the interrupt wakes us (saves power)
            Thread.Sleep(Timeout.Infinite);
        }

        // the interrupt handler 
        static void button_OnInterrupt(uint data1, uint data2, DateTime time)
        {
            foreach (char letter in MESSAGE.ToLower())
            {
                string morse = ConvertTextToMorse(letter);
                TransmitMorse(morse);
            }
        }
 
        public static String ConvertTextToMorse(char letter)
        {
            int index = -1;
            index = Array.IndexOf(Letters, letter);
            if (index != -1)
                return MorseCode[index];
            return string.Empty;
        }
 
        public static void TransmitMorse(string morse)
        {
            foreach (char c in morse)
            {
                Thread.Sleep(IEGAP);
                if (c == ' ')
                    Thread.Sleep(LONGGAP-IEGAP);
                else
                {
                    led.Write(true);
                    if (c == '-')
                        Thread.Sleep(LONGMARK);
                    else
                        Thread.Sleep(SHORTMARK);
                    led.Write(false);
                }
            }
        }
    }
}

Also thanks to the "CodingFreak" blog for the very nice instructions on adding syntax highlighting to Blogger!

Sunday, June 19, 2011

Is Father's Day over yet?

My wife told me tonight that most men, when polled, say that their ideal Father's Day is a 12 pack of beer and to be, "Left the hell alone" for a day.

I apparently did this wrong.  :)


We constructed a giant Estes model rocket.  Our rocket was "The Dude" (like this one above (not us)) a 7 foot long, inflatable chrome mylar rocket.  My wife had found it at Walmart about 3 years ago.  It had been gathering dust in the basement since then, except when my younger son periodically found it and asked, "When are we going to launch this?".

Apparently today was the day.  We put it together and went out and launched it three times.

Very fun.

After that, after we cooled down, we came home and then spent the afternoon building everyone a home made LED "flashlight" out of some plastic snus cans, momentary contact switches, LED's, 9 volt batteries and resistors.  So, the boys got a chance to learn some basic soldering, constructing a basic series circuit and we had a very minor conversation about Ohm's law.

This page is pretty good is you want to make this circuit:  http://www.kpsec.freeuk.com/components/led.htm

We made:

  • 2x High brightness white LED's
  • 2x Yellow LED's
  • 2x Ultra high brightness LED's
  • 1 with a red LED and a pulsing (effect from the blinking LED in series) high brightness white LED

So, anyway, a fun day, but I'm exhausted.  I should have taken a vacation day tomorrow.  :)

Tuesday, June 14, 2011

The Problem...

Star Trek Mission:  
"... to explore strange new worlds, to seek out new life and new civilizations, to boldly go where no man has gone before."

USAF Mission:
"The mission of the United States Air Force is to fly, fight and win … in air, space and cyberspace."

NASA Mission:
"Drive advances in science, technology, and exploration to enhance knowledge, education, innovation, economic vitality, and stewardship of Earth."

You hit where you aim.


(http://www.nasa.gov/pdf/516579main_NASA2011StrategicPlan.pdf)

Saturday, June 11, 2011

4 Generations of "computer crime"?

I read this interesting slide show tonight.  It talked about change in software companies over the past 20+ years.  http://www.readwriteweb.com/hack/2011/05/mo-data-mo-money.php

It divided these companies into generations like so:
  1. First Generation (IBM) "The money is in the hardware, not the software"
  2. Second Generation (MSFT) "Actually, the money is in the software"
  3. Third Generation (GOOG) "The money is not in the software, but it is differentiating"
  4. Fourth Generation (Facebook/Twitter) "Software is not even differentiating, the value is the data"
I found this an interesting idea.  I wonder if you could do the same to define "generations" of "computer crime".

Perhaps:
  1. First Generation: Steal Service (70's and 80's - phreaking, war-dialing, etc)
  2. Second Generation: Steal Software (80's and 90's - cracking, serials, etc)
  3. Third Generation: Steal Network (90's up and 00's - DDoS, illicit file servers, shells, etc)
  4. Fourth Generation: Steal Data (2000-present - SQLi, carding, etc - monetization) 
I know this is probably more often roughly split up like:
  1. Pre-history - Phone systems
  2. PC's - Attacking individual PCs, PC software, viruses, etc
  3. Networks - Attacking network services
  4. Network Applications - Attacking networked applications
Obviously, none of these divisions completely work - there are significant outliers in each case.

But I'm starting to think that we should acknowledge that it has always really been about the application - only the goals have changed.  That ultimately, the problem has always been bad software (requirements, design, implementation, testing, configuration, etc) whether it was phone switch hacking or virus/cracking activity or DDoS/root shells or "modern" web hacking.