Monday, May 12, 2014

Internet of Treadmill(s) part 1.

So, yeah... It's been about a year and a half since I updated my blog...

Sorry. I took a year off from most of my hobbies to get my health back on track. I've been pretty successful in this regard, having lost a maximum of 120# and changing all of my medical indicators from "OMG! You're gonna die" to "pretty good for an old guy" or in some cases "optimal".

I also took up running as a new hobby and went from jogging for 30 seconds and dieing in a sweaty gelatinous mass to a sub 30 minute 5k and a sub-hour 10k. (yeah, not signing up for the Olympics quite yet, but still... I'm old, leave me alone! (And you kids get off my lawn!))

So, all in all a pretty good year.


Anyway... Enough of that.  I'm back and now it's time for another project!

You've heard of the "Internet of Things"...

Now it's time for...


(drum roll)

The Internet of Treadmills! (dun, dun, duuunnnn...)

Unlike most runners, I love my treadmill. It is a love born of the unfailing support it gave me when I was 288# when I started running c25k on the poor thing. How many of these wimpy "things" people are networking together can take that kind of abuse? None! I tell you!

Now, my treadmill has one glaring omission. The quick speed settings only have even numbered speeds. So, going 2, 4, 6, 8, 10, or 12 mph can be accomplished using a single button. But going 7 mph involves clicking the 6 mph button and then clicking the + button 10 times.

Which, really, isn't the worst thing that has ever happened to me. But you know... Clearly, this had to be upgraded. :) And buying a more completely equipped treadmill is not an option - I love my treadmill, and you don't just swap out things you love because they don't have enough buttons.

So, like anyone would do, I hit the Internet and bought some parts:
  • Raspberry Pi - I had this sitting around since it was released. So, rev 1 with no screw holes.(grrr) Running Raspbian. This will be the controller - it's excessive.
  • 8 port relay board - optically isolated and rated to 10 Amps at up to 250 volts - also excessive :)
  • tiny wifi module for the Raspberry Pi
  • a bunch of ribbon cable
  • node.js - will provide a REST API to control the GPIO pins (part 3)
  • Apache - Main web server, will have some sort of pretty interface (part 3+ - I have a bunch of plans for this) with AJAX calls to the REST API
  • Some cheap 8 inch tablet off of woot.com for the control panel.
So, in a nutshell, that's the plan. (bwah ha ha ha!)

Tonight, after a bit of disassembly and some crappy soldering:


The treadmill is now fully wired for phase 1.


From these 2 ribbon cables, I can control:
  • Incline, in steps of 2% (from 2% to 8%)and +-0.5%
  • Speed, in steps of 2 mph (from 2 mph to 12 mph) and +-0.1 mph
  • Start and stop
Now, I only have 8 ports on my current relay board, so I'll have to make some choices on what to control for now. Future plans include increasing this to 16 ports, changing out or expanding the rPi (I'll need more accessible GPIOs) and adding some additional sensors (speed via Hall effect and temperature at least), probably an RTC, maybe fan control too, maybe integration with a TV (I have a little HDMI injector thingy from Chumby that has been looking for a purpose for some time - maybe it should become a heads-up display driver), BLE for interface or HR monitor?, NFC authentication?, camera? (is it still a "selfie" if it's taken automatically?), audio interface for mid-workout heckling?, etc).

So, Phase 1 of Phase 1 is done. :) Stick around and I'll be posting more soon - probably wiring up the rPi and the relay board by the end of this weekend. The week after probably v0.1 of the control software.


Saturday, December 22, 2012

"Life" on Canvas

So, it _finally_ snowed on Wednesday.

This has been a very mild Fall.  So, I haven't been messing around with inside projects too much.

But last night I did do a little implementation of the "game" Conway's Game of Life (http://en.wikipedia.org/wiki/Conway%27s_Game_of_Life) in JavaScript using the canvas tag.


It doesn't do much, it's randomly seeded and the edges aren't really handled properly.

If you click on the canvas, it will unleash a glider.  :)

You can zoom with ctrl+ and ctrl- (browser zoom).

Monday, March 19, 2012

My 2¢ on bcrypt vs ___

The topic came up today "Don't use bcrypt, use this instead".

http://www.unlimitednovelty.com/2012/03/dont-use-bcrypt.html

In my opinion, as a practical matter (and as a non-cryptographer), this conversation doesn't actually matter at all.

  1. Cryptographers (as a whole) rarely fully agree on anything anyway - this is no different.  
  2. No one is suggesting that bcrypt is fatally flawed, just that someone thinks there might be better options.
  3. "Use bcrypt" is perfectly good advice to give to people who were planning to:
    1. Use clear text
    2. Use ROT13 (2 rounds :) )
    3. Make up their own "crypto" (ROT13 then XOR with MAC address, etc)
    4. Use an unsalted hash
    5. Use crypt
    6. Encrypt passwords (versus hash)
    7. Use a salted hash with a globally shared salt
    8. Use a salted hash with individual salts
  4. "Use bcrypt" is still perfectly good advice even if PBKDF2 or scrypt are indeed better.
  5. bcrypt is (thankfully) becoming quite widely available.  And some people are even using it! :)

At the end of the day - you can modify your message to be, "Use bcrypt or scrypt or PBKDF2", if you really want.  But "Use bcrypt" is still perfectly valid advice.

Saturday, February 18, 2012

Tunneling MQTT over SSH

Tunnel image from http://www.imageafter.com/
One approach that can be used to secure protocols that do not have native encryption is to tunnel them over a known secure protocol.

This can be a VPN protocol like IPSec or it can be a secure general purpose protocol like HTTPS/TLS or SSH.

In this post, we will discuss tunneling MQTT over SSH in a simple and a more advanced configuration.

What is SSH?
SSH is a great protocol that is essentially a drop-in replace for many older, insecure protocols.

For example, SSH can(should) replace telnet, FTP, rlogin, rsh, rcp, etc, etc. It's like the secure Swiss Army knife of protocols.

Simple Configuration with Interactive Password
For the most basic implementation of SSH tunneling all you need is SSH installed on both devices.  The end with the service that you want to connect to must offer the SSH service and you need an SSH client on the end you wish to connect from.  You will also, obviously need an account on the server side.

Once you have this and have tested that the basic functionality works, we will need to set up the tunnel.  For this section we will assume that you are using the default ports for SSH (22) and MQTT (1883).  We will also need to select another port for the local tunnel endpoint - let's use 22883 (which is officially unassigned (IANA) yet, you should check your local machine first to make sure it is not in use (i.e., netstat -an)).

Now we need to enter only one command to set this up:

ssh -f -L 22883:127.0.0.1:1883 SSHusername@MQTT -N

'-f' means to fork into the background.
'-L' means to do a local tunnel.
'22883' is our local port number.
'127.0.0.1' is the destination host from the perspective of the tunnel destination.
'1883' is the MQTT port on the destination server.
'SSHusername' is the username that you use to login to the MQTT server's SSH service.
'MQTT' is the name or IP address of the MQTT server.
'-N' tells ssh not to run a command on the remote server.

You will be prompted for your password (for the SSH connection).

Now, if you connect to MQTT from this system using the localhost address and a port of 22883 like this:

mosquitto_sub -h 127.0.0.1 -p 22883 -u dan -P password -t 'test/#'

You will connect to the MQTT broker on your MQTT server - but this time over a secure (encrypted and authenticated) SSH connection.

The problem with what we have so far it that we need to be at the client to set up the tunnel - which is fine if it is our PC - but if it is a server, we probably need a solution that doesn't need an interactive password - but one that also does not sacrifice security.  This is what we will look at next.

Configuration to Support Key-based Authentication
SSH supports a wide variety of authentication natively and many more via the PAM (plugable authentication) interface.  We are going to enable the public/private key based authentication so that we can login to our MQTT server over SSH without providing a password - or leaving a password stored in plain-text.

Since our purpose here is to make this work in an unattended manner, we will not give a passphrase for our private key - keep in mind that this can lead to security problems - do not re-use this key for other purposes/servers and apply additional server side controls.

To generate our key, on the client side, run:

ssh-keygen

Then accept the defaults. If you want a passphrase - this would be the time to add one. Now run:

ssh-copy-id username@host

This copies your key into the .ssh/authorized_keys file.

If you didn't enter a passphrase - as I mentioned before - you'll want to provide additional security on the server side.

Some of those additional server-side controls might be to lock down what logins that use this key can do.  To do this, you can go to the server and edit the .ssh/authorized_keys file adding some options to the beginning of it:

from="192.168.1.*",no-pty,permitopen="127.0.0.1:1883",command="/bin/false" ssh-rsa AAAAB....


This limits logins to the 192.168.1.x network, declines to assign a pty, limits the forwarding to the localhost on the MQTT port, and runs the command "/bin/false" on login.  The point here being to lock down what the passwordless key can do to those things that you want that key to do anyway (no interactive logins, no sftp logins, no tunneling to other servers, no reusing the key on other servers, etc.   The ssh/sshd man pages have more information on other settings that may be useful for enhancing your security.

Once this is all done and you are satisfied with the security - just go back and run your ssh comand from above and you will not be prompted for a password (unless you set a key passphrase).  Now you should be able to use the tunnel as before, but with no password required.

Tuesday, February 7, 2012

Mosquitto on the PogoPlug

Pretend this is a Mosquitto...
Updated: Fixed the Makefile for the clients so they install to /usr.  Added links to the files and to the source package.

I got a PogoPlug this afternoon - the master plan being that all my gizmos talk to a broker on a low power computer of some sort - and this super cheap computer + an unused 8GB thumb drive seemed perfect.

The PogoPlug - in case you didn't click through - is a little linux computer intended to be "Your personal cloud" and allow you to share a USB drive via the Internet.  Which seems pretty cool.

For my purposes - it is a > $35 computer with 4 USB ports and Gig Ethernet.

So, after following these directions:  http://archlinuxarm.org/platforms/armv6/pogoplug-provideov3 and a couple issues (buggy udev and initscripts - a bit scary when ssh quit working a couple times*) I got ArchLinuxARM installed on this (a pretty well-paved path).

Next, I went looking for mosquitto for this in a "pacman" archive.  There was one there, but it was marked as "orphaned" (http://aur.archlinux.org/packages.php?ID=51571), so I updated this to install the bright and shiny 0.15 version that Roger just released the other day (http://mosquitto.org/download/).

Below are the files for this.  Keep in mind that I've never done this sort of packaging before - so be gentle. :)

They seem to work - at least they did for me - no guarantees though.  If you want to use them, copy them to a dir on your PogoPlug (assuming you have the dev environment installed already ('pacman -S kernel26-headers file base-devel abs python')), then as a non-root user, run 'makepkg -s' in the dir with these 2 files.  This will compile and build the pacman archive.  Then as root, run 'pacman -U mosquitto-0.15-1-arm.pkg.tar.xz' which will install this archive.

The benefits to installing like this is that you can now use pacman to manage (install, remove, etc) this package and don't end up with orphan files all over.

There is a repository for sharing this sort of thing at http://aur.archlinux.org/index.php - I haven't uploaded it yet - might be cool to have it up there though.

But it all works!  My Netduino is talking to Mosquitto on my PogoPlug!  :)

* If anyone wants to do this - let me know and I'll try to document the speed-bumps and the fixes.


# This is the PKGBUILD for mosquitto, an MQTT broker and example clients
# Maintainer: Gordon JC Pearce 
# Edits for 0.15 by Dan Anderson 
#

pkgname=mosquitto
pkgver=0.15
pkgrel=1
epoch=
pkgdesc="An MQTT broker and clients"
arch=(i686 x86_64 arm)
url="http://mosquitto.org/"
optdepends=('python: python support')
license=('BSD')
source=(http://mosquitto.org/files/source/$pkgname-$pkgver.tar.gz config.patch)
md5sums=('7ae0ac38f1f379578ab5530e5dc7269e'
         '2fd36955e7b5fe071e0a3e38e25ed46a')

build() {
  cd "$srcdir/$pkgname-$pkgver"
  patch -p1 < $srcdir/config.patch
  make
}

package() {
  cd "$srcdir/$pkgname-$pkgver"
  make DESTDIR="$pkgdir/" install
  install -Dm644 COPYING $pkgdir/usr/share/licenses/$pkgname/COPYING
}

# vim:set ts=2 sw=2 et:

And here is the config.patch file referenced above.


--- mosquitto-0.15/config.mk    2012-02-07 01:08:00.000000000 -0600
+++ mosquitto-0.15/config.mk.edit       2012-02-07 01:08:26.000000000 -0600
@@ -24,6 +24,6 @@ MSGMERGE=msgmerge
 MSGFMT=msgfmt
 DOCBOOK2MAN=docbook2man.pl

-prefix=/usr/local
+prefix=/usr
 mandir=${prefix}/share/man
 localedir=${prefix}/share/locale

--- mosquitto-0.15/client/Makefile      2012-02-05 03:13:24.000000000 -0600
+++ mosquitto-0.15/client/Makefile.edit 2012-02-07 22:54:00.000000000 -0600
@@ -2,7 +2,7 @@ CC=cc
 CFLAGS=-I../lib -Wall -ggdb
 LDFLAGS=-L../lib ../lib/libmosquitto.so.0
 INSTALL=install
-prefix=/usr/local
+prefix=/usr

 .PHONY: all install uninstall clean

Since copy/pasting these will mess with the md5 sums, here are links:
http://dananderson.us/pogo/PKGBUILD
http://dananderson.us/pogo/config.patch
Or both in a "source package"
http://dananderson.us/pogo/mosquitto-0.15-1.src.tar.gz
(Install with 'makepkg -s' then 'pacman -U mosquitto-0.15-1-arm.pkg.tar.xz')

I posted this to the AUR:  https://aur.archlinux.org/packages.php?ID=51571

Sunday, February 5, 2012

Review: "The IDA Pro Book: The Unofficial Guide to the World's Most Popular Disassembler" by Chris Eagle; No Starch Press

Review:  This is _the_ manual you need if you use IDA Pro for fun or profit.  It covers a wide range of information ranging from disassembly basics to writing plugins for IDA.  It provides sufficient detail without the tedious extraneous information you often have to dig through in technical books.

IDA is one of those tools that you can use for a long time and still miss a lot of the functionality that it has.  Chris does a masterful job of illuminating these features (as well as the pieces everyone uses) with good examples and an appropriate level of detail. 

There is a very well done map to this book in the "Introduction" before chapter one - this enables readers of any level of experience to focus.  But, I found that there was value to reading all of the sections anyway.

The accompanying website is well done and provides the examples, a small errata and additional references. (http://idabook.com)

This may go without saying, but you should have access to IDA PRO to get the full value from this book.  This edition is less applicable to the freeware version than the last edition was (although I'd still probably recommend it for anyone using IDA).

Bottom line:  If you use (or plan to use) IDA PRO - buy this book.

http://shop.oreilly.com/product/9781593272890.do

Disclosure: I was provided with a free PDF copy of this book by O'Reilly as a part of their "Blogger Review Program" program.  (http://www.oreillynet.com/oreilly/bloggers/)

Sunday, January 22, 2012

TMP36 Temperature Sensor

Before I got on a side-track on the MQTT project, I'd wanted to interface with a temperature sensor. The one I had originally chosen turned out to be a one-wire digital sensor.  This is probably a great sensor, but there are, as I understand now, some issues with the Netduino and one-wire sensors.  So, that sensor got sidelined until this support is fixed up and in non-beta firmware (or until I buy a FEZ Cobra - which would address several issues I'm facing - albeit with a significantly higher price tag.)

So, off I went to find a analog temperature sensor.  There are numerous options - I even briefly thought about drafting one of my MSP430's for this.  :)

But I settled for a TMP36 from Futurlec.  This (I mean 'these' - never only buy 1 of anything :) ) arrived on Friday after a trip from Hong Kong along with a bunch of random odds and ends that I'm tired of going to Radio Shack to get - 2 at a time (I'm ok with 100%+ markup to get it in town - but throw 10-20 into a bag, not 2).

Between the datasheet (http://www.analog.com/static/imported-files/data_sheets/TMP35_36_37.pdf) and some help from the AdaFruit blog (http://www.ladyada.net/learn/sensors/tmp36.html) we got it working pretty well.


The cap is actually a normal orange ceramic disk - not sure why Fritzing doesn't have those.  It was added per the datasheet (0.1uF) for RFI purposes - but, in my non-scientific testing, it didn't make any difference if it was there or not (at least in my environment - which I'd figure is a mess RFI-wise).

I have several temperature sensors that I want to play with, so we made a class to hold those:


using System;
using System.Threading;
using Microsoft.SPOT;
using Microsoft.SPOT.Hardware;
using SecretLabs.NETMF.Hardware;

namespace Temperature_Sensors
{

    public static class TMP36
    {

        // port is analog port
        // sample is the number of samples to take
        // interval is the time (ms) to wait between samples
        // voltage is input voltage * 1000, default is 3.3v
        public static float getVoltage(AnalogInput port, int sample = 10, int interval = 100, int voltage = 3300)
        {
            int reading = 0;
            for (int i = 0; i < sample; i++)
            {
                Thread.Sleep(interval);
                // Read the value on the AIO port
                reading += port.Read();
            }
            reading /= sample;
            Debug.Print("Reading: " + reading + "");
            // Voltage at pin in milliVolts = (reading from ADC) * (3300/1024) http://www.ladyada.net/learn/sensors/tmp36.html
            return (reading * (voltage / 1024F));
        }

        public static float getCTemp(AnalogInput port, int sample = 10, int interval = 100, int voltage = 3300)
        {
            // Temp in °C = [(Vout in mV) - 500] / 10 http://www.ladyada.net/learn/sensors/tmp36.html
            return ((getVoltage(port, sample, interval, voltage) - 500F) / 10F);
        }

        public static float getFTemp(AnalogInput port, int sample = 10, int interval = 100, int voltage = 3300)
        {
            // Convert to °F 
            return ((getCTemp(port, sample, interval, voltage) * (9F / 5F)) + 32F);
        }
    }
}

And here is a program to drive this - with a timer being used to periodically collect the temperature:


using System;
using System.Net;
using System.Net.Sockets;
using System.Threading;
using Microsoft.SPOT;
using Microsoft.SPOT.Hardware;
using SecretLabs.NETMF.Hardware;
using SecretLabs.NETMF.Hardware.NetduinoPlus;
using Temperature_Sensors;

namespace myTempSensor
{
    public class Program
    {
        static AnalogInput analogInput;

        static void checkTemp(object o)
        {
            float fTemp = TMP36.getFTemp(analogInput, 10, 100, 3300);
            Debug.Print("Temp: " + fTemp + "");
        }

        public static void Main()
        {

            analogInput = new AnalogInput(Pins.GPIO_PIN_A0);
            Timer tempTimer = new Timer(new TimerCallback(checkTemp), null, 1000, 10000);

            // go to sleep until the timer wakes us (saves power)
            Thread.Sleep(Timeout.Infinite);
        }
    }
}


Right now we're not doing anything with this data - but soon we'll smoosh this up against the MQTT stuff and start getting this published - probably to the test.mosquitto.org server.

<aside>
Speaking of which - we might have to take another break and write some visualization stuff - Roger of Mosquitto fame has issued a challenge (http://mosquitto.org/2012/01/challenge-web-based-mqtt-graphing/) for visualization of some energy data that is being fed to his server.  This might be fun.  I'm thinking of using the Node.js client then feeding that data into the Google charts API.
</aside>

Anyway, I haven't got this sensor to be particularly accurate yet.  Although, forcing my math to floating point math REALLY helped.  :)  I may just try a thermistor.  Not sure, I'm sure that a digital sensor is probably the right plan...  I think my main problem at this point is the accuracy of the sensor (+-2C), mixed with the stated "non-high precision" of the Netduino ADC's.  So, this combination seems to be about as accurate as that of my other "high precision" thermometer.  :)


Since the accuracy is odd - I added the ability to collect a bunch of readings and average them.  Not sure it really helped as much as I would have expected either, but it's there.

I think next up is going to be a Syslog library for the Netduino - which will require an NTP library since I don't have an RTC board handy and you need time for logs.  (FEZ Cobra has one though I think....Which might be a better approach than buying a mini-board...  I don't know...  I could do SSL with the Cobra too...)

And we'll keep working on the MQTT stuff.  Still need a couple message handlers and to redo some stuff related to the fixed headers.

Also, kind of seriously thinking about writing an MQTT-S gateway (forwarder?) and client for the Netduino Plus - then getting some sort of comm stuff to talk between a few things around here.  I'm kind of taking that "no publicly available implementation" bit as a challenge...  :)


Tuesday, January 17, 2012

Project updates - 16 Jan

Over the last week or so, we've had some fun and made some progress on a couple projects.

Last week we went to the Omaha Maker's Group meeting.  This was our first trip down there.  It's a nice location full of neat projects and interesting people.  We watched a fun presentation on an attempt at a high-altitude rocket build and launch.  The kids have been asking when the next one is scheduled for.  :)

Speaking of the OMG, we're going there on the 7th of Feb to demo our little robot and maybe a couple other Netduino projects (maybe HID and MQTT).

On the robot front, we got our new IR sensor in the other day.  Tonight Steven got the new sensor installed and then I added some button support (on/off) and re-calibrated the code for the new sensor (a bit more near-sighted (our choice) than the last one we used).  I then did a brief write-up on how everything works and a pin-out chart in case something happens in-route - because he's taking the robot to school to show his in-school robotics class!


On the MQTT front, I got the publishing bit all done and am now in the process of adding subscription support.  I really need to get this completed in the next couple of days, because I have a NeTV en-route to me and I know as soon as I get that - I'll be up all night fooling with that instead of MQTT.  :)

We ran to Harbor Freight this weekend and got our free screw-driver set plus picked up a $8 rotary tool and a couple bins for when my Futurlec order gets here.

Finally, we've got Valentine's Projects to get to work on as soon as the parts for them arrive.  I need to find a place in town that can do plastic work - we could use some cut plastic sheet to dress our projects up a bit...

I have so many projects going on - we'd better get some snow soon.  :)

But that's it for us, for now.

Monday, January 2, 2012

Half-Baked MQTT Publisher for Netduino Plus

UPDATE:  This has been moved to GitHub: https://github.com/danielan/NetduinoMQTT

I received a Netduino Plus for Christmas this year. So, I needed a project to put this to work. After working my way through the O'Reilly/Make book, "Getting Started with the Internet of Things" book, I decided to implement a MQTT publisher for my Netduino Plus.

Now, MQTT is a really cool protocol that can be used for all sorts of things and supports all sorts of neat features.  This isn't that sort of program.  :)

All this does, in a weak way, is connect to a message broker, publish a message without QoS and then disconnect.  This is NOT how you should do it.  This doesn't work for long topics, long messages, etc.  It doesn't retry if there is a problem, etc.

This is intended only for my use - ultimately publishing a temperature from a sensor over and over - but I'm back to work tomorrow, so this will probably be idle for some time.

I hope this helps - but don't use it expecting it to be useful without more work. 

So, enough disclaimers... :)

MQTT

I learned of MQTT from this post at AdaFruit: http://www.adafruit.com/blog/2011/11/08/ibm-open-sources-potential-internet-of-things-protocol/

And the learned more from this Series on "ReadWriteWeb":
http://www.readwriteweb.com/hack/2011/11/ibms-andy-piper-negotiating-th.php
http://www.readwriteweb.com/hack/2011/11/ibms-andy-piper-part-2-how-mqt.php
http://www.readwriteweb.com/hack/2011/11/ibms-andy-piper-part-3-the-tax.php

There's also a web site at: http://mqtt.org/

And the quite useful official specification is over here: http://public.dhe.ibm.com/software/dw/webservices/ws-mqtt/mqtt-v3r1.html

Demoing MQTT

To use MQTT you need a "Broker" - I used "Really Small Message Broker" from here: https://www.ibm.com/developerworks/community/groups/service/html/communityview?communityUuid=d5bedadd-e46f-4c97-af89-22d65ffee070

To demo this, download rsmb from there and unzip it.  Then open 4 "cmd" windows and make your working directory in the folder "windows" (assuming Windows) in the rsmb directory you just extracted.

In one cmd window run: broker.exe

In the next cmd window run: stdinpub.exe test
In another cmd window run: stdoutsub.exe test --clientid one
In the last cmd window run: stdoutsub.exe test --clientid two

"test" is the name of our topic. The client ids are necessary because, I assume, there is a bug in the windows stdoutsub.exe binary - the names are supposed to be unique by default*, but aren't.

* "Help" for stdoutsub.exe: "--clientid <clientid> (default is hostname+timestamp)"  But in reality they seem to default to "stdout-subscriber" - I'll see if I can find someone to report this to.

Now, if you type something into the stdinpub.exe window - you should see it show up in the two stdoutsub.exe windows.  This is, simplistically, what MQTT is for (lightweight publisher/subscriber model comms).

(These windows will also be useful to see if our program is working.)

The Code

There's a library available for MQTT on all sorts of languages and software, but I couldn't find anything for the Netduino Plus (although maybe the .NET one would work?)

It would probably be a good idea to read through the standard first.  I used hex for flags and numbers where they made more sense.  I started to do constants, but didn't get finished yet...

(Note - the flags are easier to decipher if you remember that for hex you use 4 bits per hex digit.)

While keeping in mind that this is not appropriate for actual use....

Here is the code for the "library".

using System;
using System.Net;
using System.Net.Sockets;
using System.Text;
using Microsoft.SPOT;
using Socket = System.Net.Sockets.Socket;

namespace Netduino_MQTT_Client_Library
{
    static class Constants
    {
        public const int MQTTVERSION = 3;
    }

    public static class MQTTClient
    {
        // From Sample Code (SockClient.cs) Copyright Microsoft
        public static Socket ConnectSocket(String server, Int32 port)
        {
            // Get server's IP address.
            IPHostEntry hostEntry = Dns.GetHostEntry(server);

            // Create socket and connect to the server's IP address and port
            Socket socket = new Socket(AddressFamily.InterNetwork,
                SocketType.Stream, ProtocolType.Tcp);
            socket.Connect(new IPEndPoint(hostEntry.AddressList[0], port));
            return socket;
        }
        // End of Microsoft Copyright sample code

        public static void ConnectMQTT(Socket mySocket, String clientID)
        {

            int index=0;
            byte[] buffer = null;
            buffer = new byte[16 + clientID.Length];
            // Fixed Header (2.1)
            buffer[index++] = 0x10; // Fixed header flags
            buffer[index++] = (byte)(14 + clientID.Length); // Remaining Length
            // End Fixed Header
            // Connect (3.1) 
            // Protocol Name
            buffer[index++] = 0;       // String (MQIsdp) Length MSB
            buffer[index++] = 6;       // Length LSB
            buffer[index++] = (byte)'M';  // M
            buffer[index++] = (byte)'Q';  // Q
            buffer[index++] = (byte)'I';  // I
            buffer[index++] = (byte)'s';  // s
            buffer[index++] = (byte)'d';  // d
            buffer[index++] = (byte)'p';  // p
            // Protocol Version
            buffer[index++] = Constants.MQTTVERSION;
            // Connect Flags
            buffer[index++] = 0x02;
            //Keep alive (20 seconds)
            buffer[index++] = 0;     // Keep Alive MSB
            buffer[index++] = 20;    // Keep Alive LSB
            // ClientID
            buffer[index++] = 0;                        // Length MSB
            buffer[index++] = (byte)clientID.Length;    // Length LSB
            for (var i = 0; i < clientID.Length; i++) 
            {
                buffer[index++] = (byte)clientID[i]; 
            }
            mySocket.Send(buffer, index, 0);

        }

        public static void PublishMQTT(Socket mySocket, String topic, String message)
        {

            int index = 0;
            byte[] buffer = null;
            buffer = new byte[4 + topic.Length + message.Length];
            // Fixed header
            //      Publish (3.3) fixed header flags
            buffer[index++] = 0x30;
            //      Remaining Length (variable header + payload)
            buffer[index++] = (byte)(2 + topic.Length + message.Length);
            // End of fixed header 
            // Variable header (topic)
            buffer[index++] = 0;                   // Length MSB
            buffer[index++] = (byte)topic.Length;  // Length LSB
            // End of variable header
            for (var i = 0; i < topic.Length; i++)
            {
                buffer[index++] = (byte)topic[i];
            }
            // Message (Length is accounted for in the fixed header)
            for (var i = 0; i < message.Length; i++)
            {
                buffer[index++] = (byte)message[i];
            }
            mySocket.Send(buffer, buffer.Length, 0);
        }

        public static void DisconnectMQTT(Socket mySocket)
        {
            byte[] buffer = null;
            buffer = new byte[2];
            buffer[0] = 0xe0;
            buffer[1] = 0x00;
            mySocket.Send(buffer, buffer.Length, 0);
        }
    }
}

Here is the code to use this library (Don't forget to change to your IP (where broker.exe is running)).


using System;
using System.Net;
using System.Net.Sockets;
using System.Threading;
using Microsoft.SPOT;
using Microsoft.SPOT.Hardware;
using SecretLabs.NETMF.Hardware;
using SecretLabs.NETMF.Hardware.NetduinoPlus;
using Netduino_MQTT_Client_Library;

namespace NetduinoMQTT
{
    public class Program
    {
        public static void Main()
        {
            // This is where you would do your work
            Socket mySocket = MQTTClient.ConnectSocket("192.168.1.1",1883);
            MQTTClient.ConnectMQTT(mySocket,"tester123");
            MQTTClient.PublishMQTT(mySocket, "test", "testme12");
            Thread.Sleep(1000);
            MQTTClient.DisconnectMQTT(mySocket);
        }
    }
}

Deploy this to your Netduino Plus and you should see the message, "testme12" appear in your stdoutsub.exe windows (and some connection messages in your broker.exe window).


To Do

If you wanted to use this for anything, probably at a minimum you should account for connect failures, longer topics, longer messages, maybe QoS, maybe authentication, maybe use the SSL version, etc.  Since it is a "library" it would be good to support the whole subscription thing, etc.

Conclusion

So, that's it!  VERY simplistic MQTT publishing from a Netduino Plus to RSMB.  When I get around to setting up my temperature sensor maybe I'll make this a bit more robust and re-visit this.

I hope you enjoyed this post.

Saturday, December 31, 2011

Netduino "Robot"

Over the past month or so my son and I built a "Robot" with our Netduino.


Parts:

Physical Assembly:

First, we mounted the 8 pin headers upside down in the motor driver breakout like this:


We did this so that we could easily mount this into the breadboard and see the pin descriptions.  We didn't insert it all of the way into the breadboard - rumor has it that these get hot - although ours does not seem to.

Next, we assembled the robot chassis.  Some of the parts have tight tolerances, but everything fit together fine.

We attached the battery holders to the lower platform and the Netduino and breadboard onto the top platform.  Then we mounted the IR sensor to the "front" (the end with the 2 wheels).

Do NOT mount the IR sensor like it is in the picture above.  Our first day we managed to drive it under a kitchen cabinet and it cracked the circuit board of the IR sensor.  :(  When our replacement arrives, I think we will mount it on the lower deck so it is safer.

Wiring:

We wired it like this:

IR sensor yellow wire to the Netduino AIN0
IR sensor black to ground on Netduino
IR sensor red to Netduino 5V

9 volt power to Netduino
6 volt power black to ground on Netduino (via the RadioShack connector and some hookup wire)
6 volt power red to motor driver VM (same as above)

Netduino to TB6612FNG breakout
DIO0 = Standby (This needs to be high (true))
DIO1 = AIN1
DIO2 = AIN2
DIO5 = PWMA
DIO6 = PWMB
DIO8 = BIN1
DIO9 = BIN2
Ground to ground

TB6612FNG breakout to motors
AO1 = Red motor lead (Right)
AO2 = Black motor lead (Right)
BO2 = Black motor lead (Left)
BO1 = Red motor lead (Left)

Code:

Now it was time to code a little bit.  As usual, the path was paved by the great authors in the communities at Netduino.com (http://forums.netduino.com/index.php?/forum/4-netduino/).

We used the library provided from this post: http://forums.netduino.com/index.php?/topic/493-netduino-tankbot/page__view__findpost__p__3665 from user ajcg1973.


using System;
using System.Threading;
using Microsoft.SPOT;
using Microsoft.SPOT.Hardware;
using SecretLabs.NETMF.Hardware;
using SecretLabs.NETMF.Hardware.Netduino;
// make sure you include the library - ours was (messily) inline

namespace IRRobot
{
    public class Program
    {
        static AnalogInput analogInput = new AnalogInput(Pins.GPIO_PIN_A0);
        public static void Main()
        {

            OutputPort stby = new OutputPort(Pins.GPIO_PIN_D0, true);
            AjbMotorTB6612FNG motors = new AjbMotorTB6612FNG(Pins.GPIO_PIN_D5, Pins.GPIO_PIN_D1, Pins.GPIO_PIN_D2, Pins.GPIO_PIN_D6, Pins.GPIO_PIN_D8, Pins.GPIO_PIN_D9);
            motors.Motor1Direction = AjbMotorTB6612FNG.MotorDirection.Forward;
            motors.Motor1Speed = 50;  // Set the motor to 50% speed
            motors.Motor2Direction = AjbMotorTB6612FNG.MotorDirection.Forward;
            motors.Motor2Speed = 50;  // Set the motor to 50% speed
            while (true)
            {
                Thread.Sleep(250); // pause to gather analog sample
                int analogValue = 1024 - analogInput.Read();
                Debug.Print(analogValue.ToString());
                if (analogValue < 550)
                {
                    motors.Motor1Direction = AjbMotorTB6612FNG.MotorDirection.Reverse;
                    motors.Motor1Speed = 30;  // Set the motor to 30% speed
                    motors.Motor2Direction = AjbMotorTB6612FNG.MotorDirection.Forward;
                    motors.Motor2Speed = 30;  // Set the motor to 30% speed
                    Thread.Sleep(1000);
                    motors.Motor1Direction = AjbMotorTB6612FNG.MotorDirection.Forward;
                    motors.Motor1Speed = 50;  // Set the motor to 50% speed
                    motors.Motor2Direction = AjbMotorTB6612FNG.MotorDirection.Forward;
                    motors.Motor2Speed = 50;  // Set the motor to 50% speed
                }

            }

        }

    }
}

This still needs some tweaking.  Or a whole re-write.  :)  But it shows how to drive the motors using ajcg1973's library and how to read the IR sensor.  We flipped forward and reverse in the library - this might mean we are driving backwards.  :)

You might want to watch the IR output values for a bit to get a feel for what it can see - ours is a bit far sighted so it runs into things some times. :) 

Conclusion:

This was a fun project.  The kids loved the little robot as it scooted across the floor avoiding obstacles.  We'll probably enhance our software and try some different sensors over the next few weeks.

We hope that you enjoyed this post.

References:

Original library code: http://forums.netduino.com/index.php?/topic/493-netduino-tankbot/page__view__findpost__p__3665
We got wiring help from this thread at the Netduino forum: http://forums.netduino.com/index.php?/topic/2396-control-dc-motor-with-dual-motor-driver/

Wednesday, November 30, 2011

A Netduino Keyboard Simulator

I realized that I haven't posted anything here in awhile...  So, to remedy this, here's my post on a Netduino keyboard simulator.

What this project does is to turn your Netduino into a "Human Interface Device" or HID.  I originally got the idea for this when I needed a fun project for a Halloween blog post at work.  A friend had sent me a link to a similar (but much more focused and useful) project: http://www.irongeek.com/i.php?page=security/programmable-hid-usb-keystroke-dongle

So, in their footsteps, and with some help from a library from the Netduino forums, we built a generic "virtual keyboard."

So, yeah - like hardware based macro keys I guess. :)


Gathering the Parts:


I use SparkFun (and they are great) - but you can probably get all of these parts from a variety of vendors.

Development Environment:

If you don't already have your Netduino dev environment setup, you can go here: http://netduino.com/downloads/ and follow the "getting started" guide to setup your development environment.

Netduino Serial Hardware Setup:

First, connect the ground of the FTDI to the Netduino ground.
Next, hook the FTDI rx pin to the Netduino dio1.
Finally hook the FTDI tx pin to Netduino dio0.

You will also want to hook up an external power source.

Connect a USB to the FTDI.

Connect a USB to the Netduino.

Netduino Serial Setup Software:

(Check your firmware version with MFDeploy - mine didn't need re-flashed.)

Once you get your parts, and your dev environment is all setup - you will need to switch your Netduino to use serial programming (because the debug info is sent over that channel and it will interfere with the USB stuff you are trying to do).

Follow these instructions to do this: http://forums.netduino.com/index.php?showtopic=945

Here's a video from Omar on the Netduino Forum that covers this too:


http://www.youtube.com/user/VCSandARM#p/u/4/-yNC1nU1Nv4

Our Program:

Once you have this setup and tested, you'll want to move on to write your program.  You'll want to download keyboard.cs from this thread (use the last one on the page): http://forums.netduino.com/index.php?/topic/2274-netduino-usb-hid-keyboard-updated-code/

Then create a new "solution" in Visual Studio, target it to your serial interfaced Netduino and add the keyboard.cs to the solution (instructions from Omar in the link above).

Finally, we add our little bit of code for this:
using System;
using System.Threading;
using Microsoft.SPOT;
using Microsoft.SPOT.Hardware;
using SecretLabs.NETMF.Hardware;
using SecretLabs.NETMF.Hardware.Netduino;
using System.IO.Ports;
using Netduino_USB_HID_Library;

namespace Netduino_Touch_Keyboard
{
    public class Program
    {
        public static void Main()
        {

            string setupResult = Keyboard.SetUp();

            Debug.Print(setupResult);

            if (setupResult != "Success")
                return;

            OutputPort led = new OutputPort(Pins.ONBOARD_LED, false);
            led.Write(true);
            Thread.Sleep(1000);
            led.Write(false);
            Thread.Sleep(1000);
            // setup our interrupt port (on-board button)
            // InterruptEdgeLow = Interrupt on button press only (not button up)
            InterruptPort button = new InterruptPort(Pins.ONBOARD_SW1, false, Port.ResistorMode.Disabled, Port.InterruptMode.InterruptEdgeLow);

            // assign our interrupt handler
            button.OnInterrupt += new NativeEventHandler(button_OnInterrupt);

            // go to sleep until the interrupt wakes us (saves power)
            Thread.Sleep(Timeout.Infinite);

        }

        // the interrupt handler
        static void button_OnInterrupt(uint data1, uint data2, DateTime time)
        {
            Keyboard.HoldDown(Keyboard.Modifiers.LeftGUI);
            Keyboard.SendChar('r');
            Keyboard.AllUp();
            Keyboard.SendString("notepad.exe");
            Thread.Sleep(2000);
            Keyboard.SendString("\n");
            Thread.Sleep(2000);
            Keyboard.SendString("Hello World!");
        }
    }
}

Compile and deploy this to the Netduino.

Then unplug (if it was already plugged into the USB) and re-plug the USB to the Netduino. This is needed because the app takes a bit to start the first time and the USB driver will fail if you plug it in too quickly - this isn't a problem in "production" since it will be externally powered and running already.

Now press the on-board button.

It should, open up a copy of notepad.exe then write "Hello World!" into it.

References:
Netduino USB HID Code and Example:
http://forums.netduino.com/index.php?/topic/2274-netduino-usb-hid-keyboard-updated-code/
Official thread on beta HID support:
http://forums.netduino.com/index.php?/topic/1514-driverless-pc-netduino-communication-using-usb/
Keyboard class from here:
http://forums.netduino.com/index.php?/topic/2372-netduino-usb-hid-touch-screen-keyboard/

Tuesday, July 12, 2011

How to annoy your wife with a Netduino...

So, I stopped by a Radio Shack tonight to pick up some parts and decided to buy the Netduino some toys.

Amongst some other pieces, I picked up a 12 VDC Piezoelectric Buzzer (RS# 273-0059).  You can find cheaper ones online - just make sure that the low-end of the voltage range for yours is around 3 volts (http://www.netduino.com/netduino/specs.htm).

You can drive this pretty easily by simply plugging this buzzer in between the ground pin (GND) and one of the digital I/O ports (I used 13 - it's right next to the ground pin).  Somewhat annoyingly, it will immediately begin buzzing when you power-up the Netduino - this does not endear you to your sleeping wife.  :)

The plan was to make the last project into something useful.  As you may know - the FCC requires that amatuer radio operators identify periodically during operation (Sec 97.119 - http://www.w5yi.org/page.php?id=124).  With a couple quick modifications - you can make your Netduino provide your ID whenever you press the button.  This might actually be useful. I don't operate on CW often, but you can ID with CW wherever CW is authorized - So, everywhere but 60 meter right (not an issue for me)?

You can do this with a couple tiny modifications from the previous project:

First, change your OutputPort from:
// setup our output port (on-board LED)
static OutputPort led = new OutputPort(Pins.ONBOARD_LED, false);

to

// setup our output port (piezo buzzer (RS # 273-0059) between D13 and ground)
static OutputPort piezo = new OutputPort(Pins.GPIO_PIN_D13, false);

Then change your write operations from:
led.Write(true|false);

to
piezo.Write(true|false);

Then switch the MESSAGE constant to your call sign.   Hit the "Start debug" button and then press your button and you should get your call sign in CW over the buzzer at about 14 wpm (based on the UNIT constant being left at 100).

(I also ran across this free eBook on the .NET Micro Framework tonight - I haven't read through it yet - but it looks interesting - check it out:  Beginner's Guide to C# and .NET Micro Framework)

Sunday, July 10, 2011

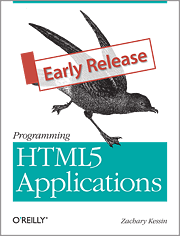
Review: "Programming HTML5 Applications" by Zachary Kessin; O'Reilly Media

I recently joined the O'Reilly Blogger Review program and the first book I selected to review was "Programming HTML5 Applications" by Zachary Kessin.

I enjoyed this book and learned a few interesting things along the way.  But I would tend to describe myself more as a JavaScript intermediate "user" more than a skilled JavaScript "programmer".  If you are an intermediate JavaScript user - this book will help you rise to the next level.  If you are already a skilled JavaScript programmer, I think you may find that there is not sufficient topical (HTML5) information in this book to justify your purchase.

Zachary Kessin has been involved with web development since the early 90's.  His experience as a working programmer shows clearly as he shares the lessons born from these experiences - this book doesn't read like a man page for JavaScript.  It reads like a talk from an experienced programmer sharing the tips of the trade - not only in terms of how - but also why you do things.  Overall this is good - but sometimes it seems like he slips into a shorthand way of describing things that takes a couple readings to decipher.

At 132 pages cover to cover, this is a short book, which isn't necessarily a bad thing.  You could probably make it shorter by skipping chapter one and ten - which really don't add much value to the experience in my opinion.  Chapter one is kind of a rehash of the history of the web with some focus on the evolution of development paradigms. In chapter ten, Zachary tries to look into his crystal ball and see the Internet of 2017.  Neither chapter is particularly relevant to the topic of programming HTML5 applications.  If you are already a skilled JavaScript programmer, you can probably similarly skip past chapters two through five without missing anything about HTML5 (although I found these chapters very useful - as they helped fill several gaps in my knowledge of JavaScript).

A better title for this book might be, "Modern JavaScript and HTML5."  Beginning in chapter two, the author takes the reader on a tour of "advanced" (my word) JavaScript methods, JQuery and ExtJS before discussing tools and methods for testing JavaScript.  I was aware of many of these topics at various levels previously, but the author does a good job of explaining them at a high level and why you would use them.  These chapters aren't really tutorials, but you get enough information to start exploring each area - which is probably how most of us learn JavaScript anyway.

From chapter six the book turns to HTML5 coverage beginning with a discussion about the LocalStorage APIs.  It goes on to offline applications, web workers and web sockets. It starts off as mostly similar content to what you would see in http://diveintohtml5.org/ or similar sites, but where it shines is that the author ties these features to real-world examples and back to the topics he previously discussed (like ExtJS and JQuery).  Throughout most of the book, the examples reinforce the text pretty well, although they could be commented better in several cases.

I think the main problem I have with this book is what I mentioned earlier - the title of the book doesn't seem to mesh with the content as well as you might hope.  For a book titled "Programming HTML5 Applications", my expectations were totally different than the (pretty good) content that was in this book.  I think I expected that the book might take that familiar path of developing a non-trivial "HTML5 Application" teaching how to use the HTML5 APIs as it goes.  I would have liked that better.

So...  Would I recommend this book?  Probably not.  It was interesting.  I learned a few things (much from chapters two and three).  It was a good start.  I wouldn't mind looking at it again when it is finished - I might change my mind (a great effort on finishing chapters eight and nine would be a good start).  But the problem right now is that there is already so much of the sort of HTML5 information that this book provides - in a very similar format ("this is what is new - here's a snippit") - available for free at a number of great HTML5 sites (like "Dive into HTML5" as mentioned before.)

Note: This was my first "Early Release" book I've looked at.  Apparently, "Early Release" indicates that the book was released directly from the author without the benefit of a review by an editor.  I found the large number of typos, misspellings, unfinished sections, etc. in the text to be quite distracting. I've tried to look past this.  I think that early access is a great idea especially for fast moving domains like web development.  But if this sort of thing bugs you - you might want to wait for the normal release.

Disclosure: I was provided with a free PDF copy of this book by O'Reilly as a part of their "Blogger Review Program" program.  (http://www.oreillynet.com/oreilly/bloggers/home.csp)

Saturday, July 9, 2011

My First Netduino App

So, as I mentioned earlier, we ordered a Netduino awhile back.  (We got ours via Amazon.)  This arrived earlier this week and I finally got some time to play with it during lunch today.

We had played with the MSP430 a little bit and messed around with an Arduino previously.  The Netduino is quite similar to the Arduino - but easier.  The combination of the Visual Studio, the .NET micro framework and the Netduino SDK (All linked to here) really works well so far.

After completing the obligatory "blink the LED" tutorial and reading the event handler example from the Netduino site I decided that a "Hello World" app was needed.  Obviously, this had to be in Morse code.  :)

So I whipped one up pretty quickly (this dev environment makes it REALLY fast - maybe 20 mins tops - mostly finding the proper timing for a dit and a dah (http://en.wikipedia.org/wiki/Morse_code)).  After work, I decided to clean it up a bit (it was a hideous sequential list of calls to dit and dah functions and sleeps).  At this time I ran across this implementation: http://www.hanselman.com/blog/TheNETMicroFrameworkHardwareForSoftwarePeople.aspx which seemed a lot more like what I was looking for.

So, mixing it all up - this is what I came up with. (Some portions © Copyright 2011, Scott Hanselman under Creative Commons Licensing http://creativecommons.org/licenses/by-nc-sa/3.0/)


using System;
using System;
using System.Threading;
using Microsoft.SPOT;
using Microsoft.SPOT.Hardware;
using SecretLabs.NETMF.Hardware;
using SecretLabs.NETMF.Hardware.Netduino;

namespace NetduinoApplication1
{
    public class Program
    {
        const String MESSAGE = "Hello World";
        const int UNIT = 100;            // controls speed
        const int SHORTMARK = 1 * UNIT;  // dit
        const int LONGMARK = 3 * UNIT;   // dah
        const int IEGAP = 1 * UNIT;      // gap between elements (dit and dah)
        const int SHORTGAP = 3 * UNIT;   // gap between chars
        const int LONGGAP = 7 * UNIT;    // gap between words
        
        // setup our output port (on-board LED)
        static OutputPort led = new OutputPort(Pins.ONBOARD_LED, false);

        private static Char[] Letters = new Char[] 
        {
                'a', 'b', 'c', 'd', 'e',
                'f', 'g','h','i', 'j', 
                'k', 'l', 'm', 'n', 'o', 
                'p','q', 'r', 's', 't', 
                'u','v', 'w', 'x','y',
                'z','0', '1', '2', '3', 
                '4', '5', '6', '7', '8',
                '9', ' '
        };

        private static String[] MorseCode = new String[] 
        {
                ".-", "-...", "-.-.","-..", ".", 
                "..-.", "--.", "....","..", ".---", 
                "-.-", ".-..","--", "-.", "---", 
                ".--.","--.-", ".-.", "...", "-", 
                "..-","...-", ".--", "-..-","-.--", 
                "--..","-----", ".----", "..---","...--", 
                "....-", ".....", "-....", "--...", "---..", 
                "----.", " "
        };

        public static void Main()
        {
         
            // setup our interrupt port (on-board button)
            // InterruptEdgeLow = Interrupt on button press only (not button up)
            InterruptPort button = new InterruptPort(Pins.ONBOARD_SW1, false, Port.ResistorMode.Disabled, Port.InterruptMode.InterruptEdgeLow);

            // assign our interrupt handler
            button.OnInterrupt += new NativeEventHandler(button_OnInterrupt);
            
            // go to sleep until the interrupt wakes us (saves power)
            Thread.Sleep(Timeout.Infinite);
        }

        // the interrupt handler 
        static void button_OnInterrupt(uint data1, uint data2, DateTime time)
        {
            foreach (char letter in MESSAGE.ToLower())
            {
                string morse = ConvertTextToMorse(letter);
                TransmitMorse(morse);
            }
        }
 
        public static String ConvertTextToMorse(char letter)
        {
            int index = -1;
            index = Array.IndexOf(Letters, letter);
            if (index != -1)
                return MorseCode[index];
            return string.Empty;
        }
 
        public static void TransmitMorse(string morse)
        {
            foreach (char c in morse)
            {
                Thread.Sleep(IEGAP);
                if (c == ' ')
                    Thread.Sleep(LONGGAP-IEGAP);
                else
                {
                    led.Write(true);
                    if (c == '-')
                        Thread.Sleep(LONGMARK);
                    else
                        Thread.Sleep(SHORTMARK);
                    led.Write(false);
                }
            }
        }
    }
}

Also thanks to the "CodingFreak" blog for the very nice instructions on adding syntax highlighting to Blogger!

Sunday, June 19, 2011

Is Father's Day over yet?

My wife told me tonight that most men, when polled, say that their ideal Father's Day is a 12 pack of beer and to be, "Left the hell alone" for a day.

I apparently did this wrong.  :)


We constructed a giant Estes model rocket.  Our rocket was "The Dude" (like this one above (not us)) a 7 foot long, inflatable chrome mylar rocket.  My wife had found it at Walmart about 3 years ago.  It had been gathering dust in the basement since then, except when my younger son periodically found it and asked, "When are we going to launch this?".

Apparently today was the day.  We put it together and went out and launched it three times.

Very fun.

After that, after we cooled down, we came home and then spent the afternoon building everyone a home made LED "flashlight" out of some plastic snus cans, momentary contact switches, LED's, 9 volt batteries and resistors.  So, the boys got a chance to learn some basic soldering, constructing a basic series circuit and we had a very minor conversation about Ohm's law.

This page is pretty good is you want to make this circuit:  http://www.kpsec.freeuk.com/components/led.htm

We made:

  • 2x High brightness white LED's
  • 2x Yellow LED's
  • 2x Ultra high brightness LED's
  • 1 with a red LED and a pulsing (effect from the blinking LED in series) high brightness white LED

So, anyway, a fun day, but I'm exhausted.  I should have taken a vacation day tomorrow.  :)

Tuesday, June 14, 2011

The Problem...

Star Trek Mission:  
"... to explore strange new worlds, to seek out new life and new civilizations, to boldly go where no man has gone before."

USAF Mission:
"The mission of the United States Air Force is to fly, fight and win … in air, space and cyberspace."

NASA Mission:
"Drive advances in science, technology, and exploration to enhance knowledge, education, innovation, economic vitality, and stewardship of Earth."

You hit where you aim.


(http://www.nasa.gov/pdf/516579main_NASA2011StrategicPlan.pdf)

Saturday, June 11, 2011

4 Generations of "computer crime"?

I read this interesting slide show tonight.  It talked about change in software companies over the past 20+ years.  http://www.readwriteweb.com/hack/2011/05/mo-data-mo-money.php

It divided these companies into generations like so:
  1. First Generation (IBM) "The money is in the hardware, not the software"
  2. Second Generation (MSFT) "Actually, the money is in the software"
  3. Third Generation (GOOG) "The money is not in the software, but it is differentiating"
  4. Fourth Generation (Facebook/Twitter) "Software is not even differentiating, the value is the data"
I found this an interesting idea.  I wonder if you could do the same to define "generations" of "computer crime".

Perhaps:
  1. First Generation: Steal Service (70's and 80's - phreaking, war-dialing, etc)
  2. Second Generation: Steal Software (80's and 90's - cracking, serials, etc)
  3. Third Generation: Steal Network (90's up and 00's - DDoS, illicit file servers, shells, etc)
  4. Fourth Generation: Steal Data (2000-present - SQLi, carding, etc - monetization) 
I know this is probably more often roughly split up like:
  1. Pre-history - Phone systems
  2. PC's - Attacking individual PCs, PC software, viruses, etc
  3. Networks - Attacking network services
  4. Network Applications - Attacking networked applications
Obviously, none of these divisions completely work - there are significant outliers in each case.

But I'm starting to think that we should acknowledge that it has always really been about the application - only the goals have changed.  That ultimately, the problem has always been bad software (requirements, design, implementation, testing, configuration, etc) whether it was phone switch hacking or virus/cracking activity or DDoS/root shells or "modern" web hacking.